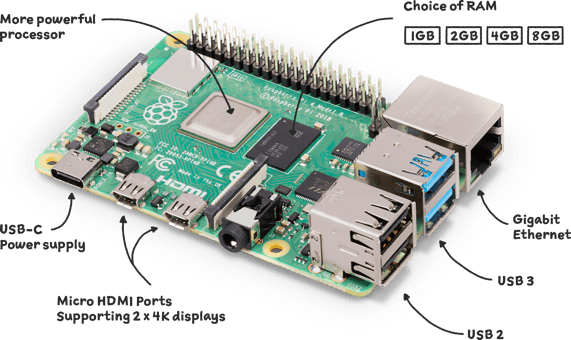
With the rise of smart homes and the increasing popularity of DIY projects, many people are looking for ways to create their own home security systems without breaking the bank. One way to achieve this is by building a home IP camera using a Raspberry Pi.
Raspberry Pi is a small, affordable, and versatile computer that can be used for a variety of projects, including home security systems. In this article, we will guide you through the steps to create your own home IP camera using Raspberry Pi.
Materials Needed
- Raspberry Pi board (any model with camera support)
- Raspberry Pi camera module
- MicroSD card (minimum 8 GB)
- Power supply (5V 2A)
- Ethernet cable or Wi-Fi dongle
- Case (optional)
Step 1: Install Raspbian OS The first step is to install Raspbian, the official operating system for Raspberry Pi. You can download the latest version of Raspbian from the official website and follow the installation guide to install it on the MicroSD card.
Step 2: Enable Camera Module Before we can use the Raspberry Pi camera module, we need to enable it in the Raspberry Pi configuration. To do this, open the terminal and run the following command:
sudo raspi-config
Select “Interfacing Options,” then “Camera,” and enable the camera module.
Step 3: Install Motion Software We will use the Motion software to capture and stream the video from the Raspberry Pi camera module. To install Motion, open the terminal and run the following command:
sudo apt-get install motion
Step 4: Configure Motion Once the Motion software is installed, we need to configure it. Open the Motion configuration file by running the following command:
sudo nano /etc/motion/motion.conf
In this file, you can configure various settings such as video resolution, frame rate, and streaming options. For example, you can set the video resolution to 640×480 by changing the following line:
width and height (pixels). Valid range: Camera dependent, default: 352×288
width 640 height 480
You can also enable streaming by uncommenting the following line:
Live Stream Server
stream_localhost off
Save the file by pressing Ctrl + X, then Y and Enter.
Step 5: Start Motion To start the Motion software, open the terminal and run the following command:
sudo service motion start
You can now access the video stream by opening a web browser and navigating to the following address:
Note that “raspberrypi” should be replaced with the IP address of your Raspberry Pi if you are not using a hostname.
Step 6: Accessing the Camera Remotely To access the camera remotely, you need to forward the port 8081 on your router to the Raspberry Pi IP address. You can then access the camera from anywhere by typing your public IP address followed by :8081 in a web browser.
Conclusion By following these steps, you can create your own home IP camera using a Raspberry Pi. You can further customize your camera by adding features such as motion detection or connecting it to a cloud storage service for remote access to recorded footage. With this DIY project, you can have a reliable and affordable home security system that you can control and access from anywhere.


No responses yet